Overview
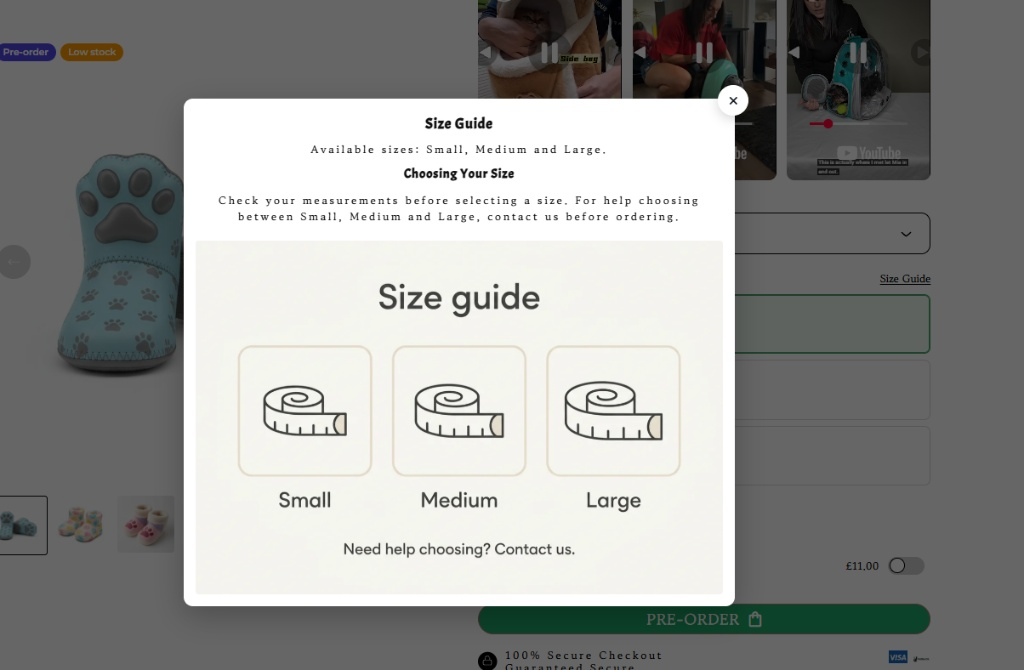
The Size Guide feature inside the Product Option Selector block allows you to display a direct link next to your product size options.
When clicked, it opens a popup modal containing detailed measurement charts, sizing instructions, custom images, or dedicated page content to help customers choose the right size and boost conversion rates.
Step-by-Step Guide
Step 1: Set Up Size Options in Shopify Admin
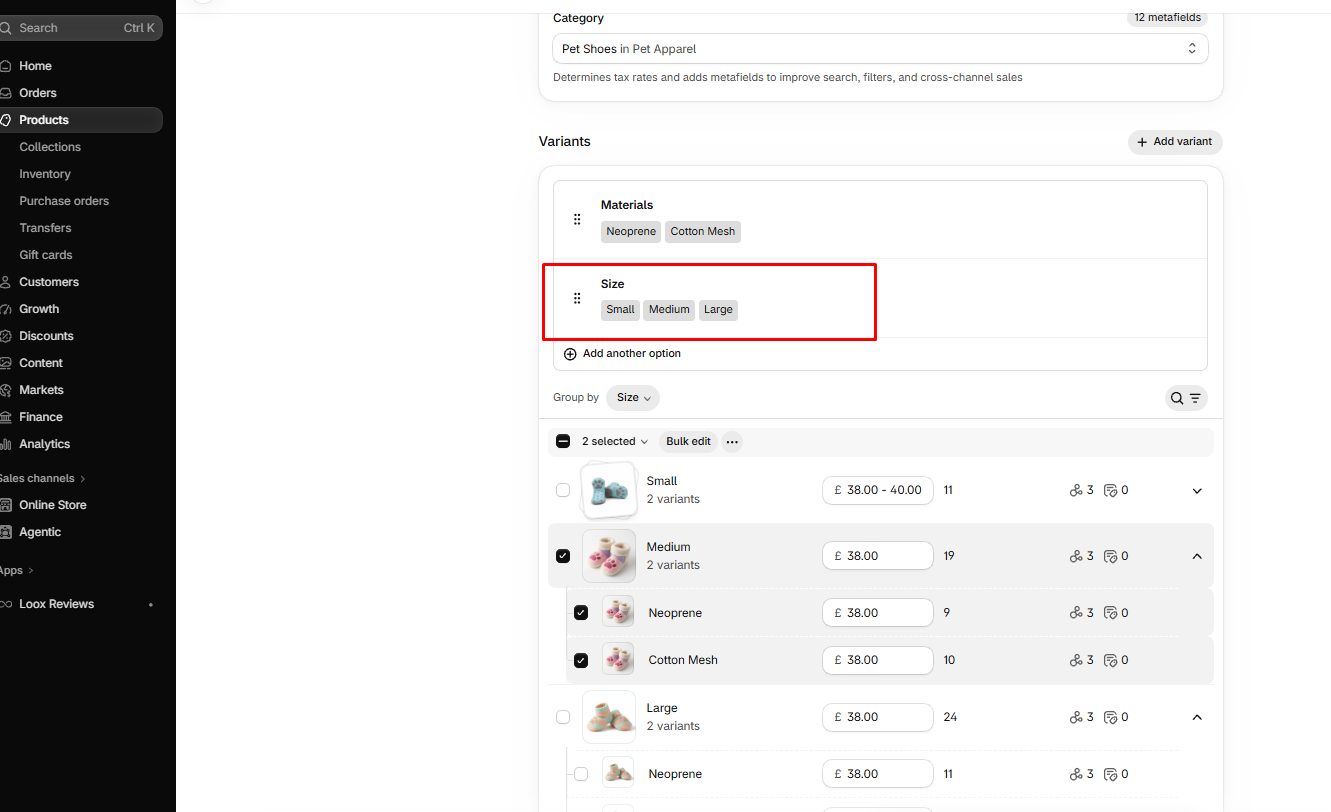
Before enabling the Size Guide in Surge, ensure your product has a Size option configured under its product variants in Shopify. Surge automatically uses this option label to place the Size Guide link right where customers select their size.
Log in to your Shopify Admin and go to Products.
Click on the product you want to update.
Scroll down to the Variants section.
Verify or add an option with the exact name Size (with values like
Small,Medium,Large).Click Save.
Step 2: Enable the Size Guide in Surge Theme Customizer
From your Shopify Admin, navigate to Online Store > Themes.
Click Customize next to your active Surge theme.
In the top template dropdown menu, select Products > Default product (or your preferred product template).
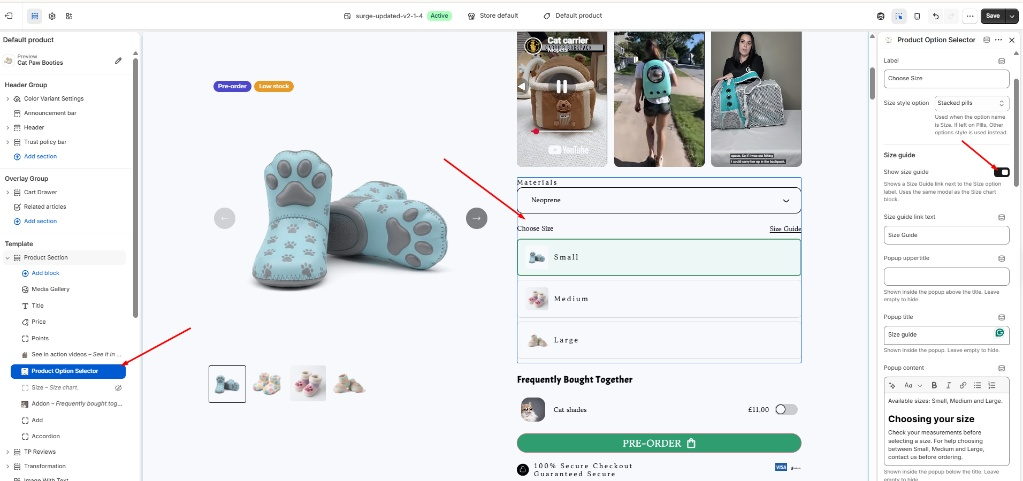
In the left sidebar under Product Section, click on the Product Option Selector block.
In the right-hand settings panel, scroll down to the Size guide section.
Toggle on Show size guide.
Step 3: Customize Your Size Guide Popup Content
Tailor the popup overlay content to match your brand and product requirements:
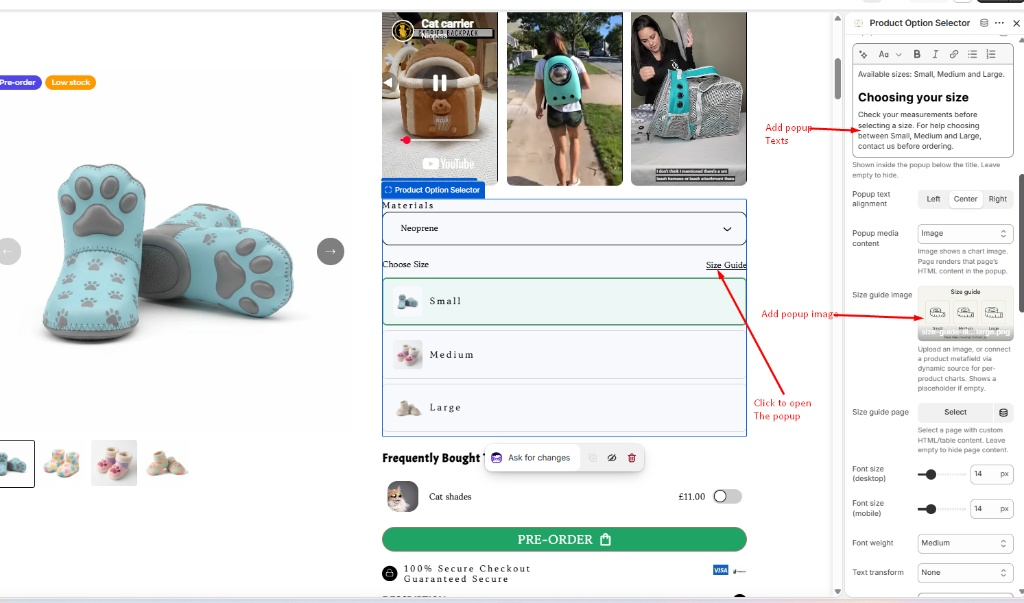
Size guide link text: Customize the link label displayed on the product page (e.g.,
Size Guide).Popup upper title: Add optional secondary header text displayed above the main heading inside the popup.
Popup title: Enter the primary heading for the modal window (e.g.,
Size Guide).Popup content: Use the rich text editor to provide clear instructions or sizing notes (e.g., "Check your measurements before selecting a size...").
Popup text alignment: Choose Left, Center, or Right alignment for your text.
Size guide image: Upload a measurement chart or graphical diagram to be displayed inside the modal.
Size guide page: Optionally connect a standalone Shopify Page if you want to render complex HTML tables or custom content.
Typography Controls: Adjust the font size for desktop and mobile, set font weight, or apply text transformations.
Click Save in the top right corner of the theme editor to apply your changes live.
? Pro Tip:If you sell multiple product categories with vastly different measurements (e.g., footwear vs. apparel), connect a dynamic metafield under Size guide image or Size guide page rather than setting a static image in the theme settings. This ensures that each product template or individual product displays its exact unique size chart without creating separate templates!
Conclusion
Adding a clear and accessible Size Guide reduces customer hesitation, lowers return rates, and enhances the overall user experience on your storefront.
If you have any further questions or need help setting up your Size Guide, please submit a ticket to [email protected] and our team will be happy to assist you!
Was this article helpful?
That’s Great!
Thank you for your feedback
Sorry! We couldn't be helpful
Thank you for your feedback
Feedback sent
We appreciate your effort and will try to fix the article